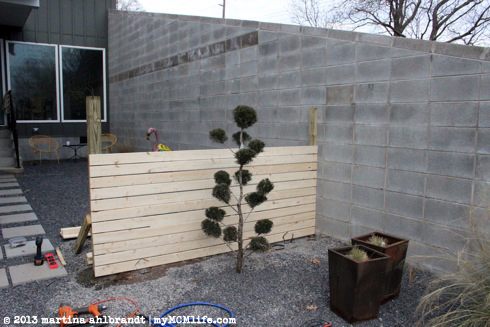
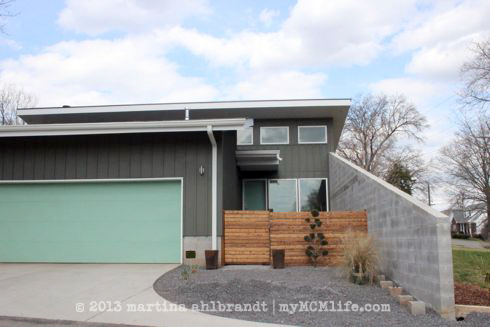
Almost 2 years ago, Jason and I built a modern horizontal plank wood fence at our previous house to enclose our back garden. We used the same technique to build this fence and gate to make the fourth “wall” of our courtyard. There were two major differences. 1. We only had a 12′ spanse to build. 2. We had concrete walls on both sides.

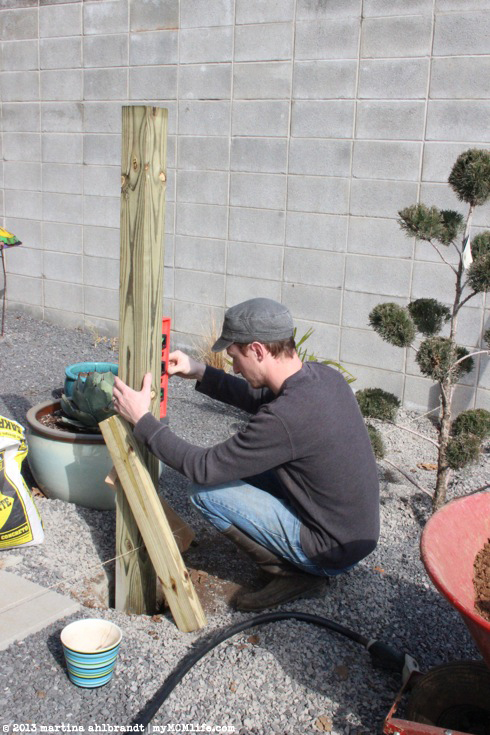
There was only 1 post hole to dig. Hooray! Jason used our trusty old post hole digger. (Jason and that post hole digger have made holes for 2 fences prior to this!) We were only making our fence 4-4.5′ tall so we used a 6′ 4×4 pressure-treated post. The post hole should be 2′ deep.

After making sure it was level, we added a few braces to keep it in place before adding the dry concrete mix and water into the post hole. Jason also added a little concrete mix and water under the post.

Next we attached two 2x4s to the side of the house. The bottom piece was going into the concrete block foundation of the house.

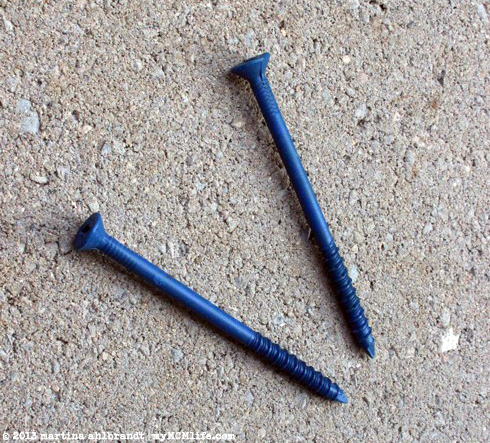
Drilling screws into concrete is not easy! We used these pretty blue concrete screws.

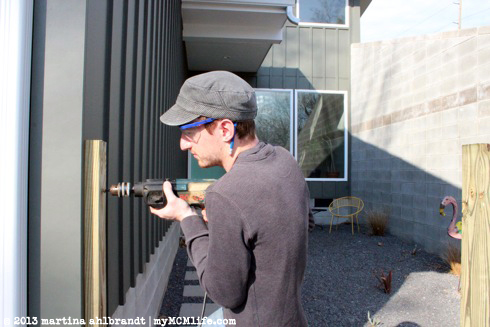
Jason pre-drilled the holes for the screws. He opted to drill into the mortar to make it a little bit easier.

Once that was secure, Jason added a second, longer 2×4 along the house. This one should have been easier because it was only going through wood (the hardibacker siding, the corner beam in our garage and the shorter 2×4 below. We borrowed this powerful hammer drill from a friend (necessary for drilling into concrete) and it was so powerful it stripped our drill bits and one of the outdoor screw heads. It seems like there is always something that goes awry on a project like this. Thankfully, he was finally able to get it secured to the house with a combination of this drill, every star drill bit we own and our wimpy Ryobi drill. The screw that was stripped was cut off with a hack saw.

Another 2×4 was attached to the concrete block wall of the courtyard. Everything went smoothly with this one so I didn’t have time to take any photos.

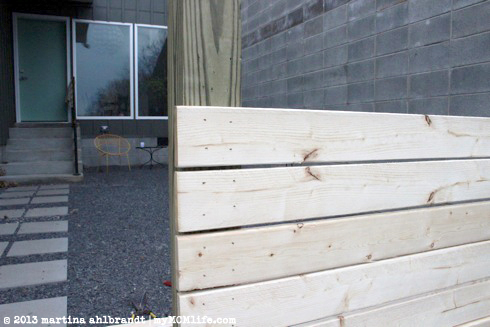
I don’t know if it’s the correct carpentry term but we call the horizontal boards planks (as opposed to pickets on a vertical fence) and to differentiate between posts and planks. Adding the planks went every quickly since we’ve done this part many times before. We started at the bottom, putting the plank as close to the ground as possible and leveling it.

We used 8′ untreated 1x4s. (Our last fence we used 1×3 ferring strips.) They’re cheap…around $1.20 a piece at Lowes. (Side note: in our experience Lowes has much better quality wood than Home Depot.) Jason used a nail gun to put four nails into each plank at the 4×4 post end and 3 nails into each plank at the 2×4 end. We work together doing this part and it moves rhythmically:
I position the plank into place.
Jason places the spacer between the planks.
Jason fires the nails into place.
I position the spacer at the other end of the plank.
Jason fires the nails into place.
Jason removes the spacer.
(Repeat.)
15x in this instance.

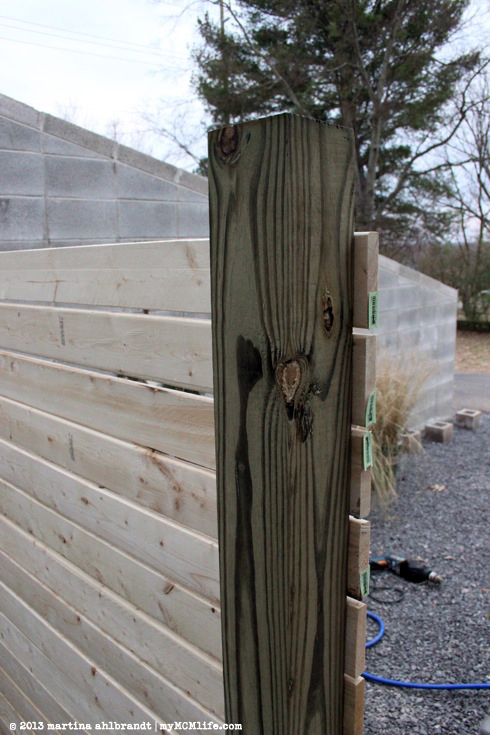
Anything sturdy and square can be used as a spacer. Since it was a fairly common question about our last fence project, I made a point of taking a picture. We used a plastic grout sample that was left at our house after construction. We have a bunch of them and it was quite convenient to have two so we could leave one at each end of the fence. They provided a gap of about 1/4″. It’s hard to see in the picture below because it’s brown…

We added another vertical 2×4 on the back side of the fence to keep the planks straighter. This 2×4 post is pressure treated but we didn’t put it into the ground. It’s only helping to keep the planks straight, not supporting the weight of the fence.We used the spacer again to make sure the gap between the planks was consistant. They’re often slightly bowed so we pushed and pulled to get them as straight as possible before nailing. Where the gap was too small, we used a pry bar to move the planks apart enough to fit the spacer.

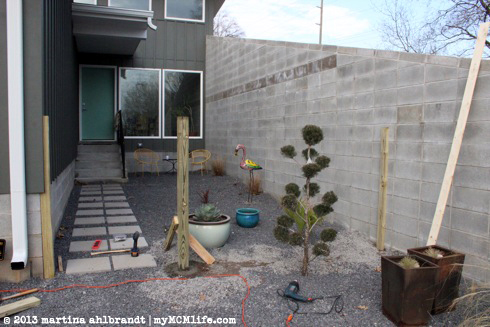
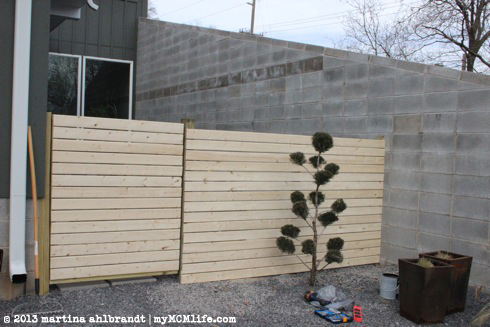
Let’s step back and admire our work for a second. Ahh…

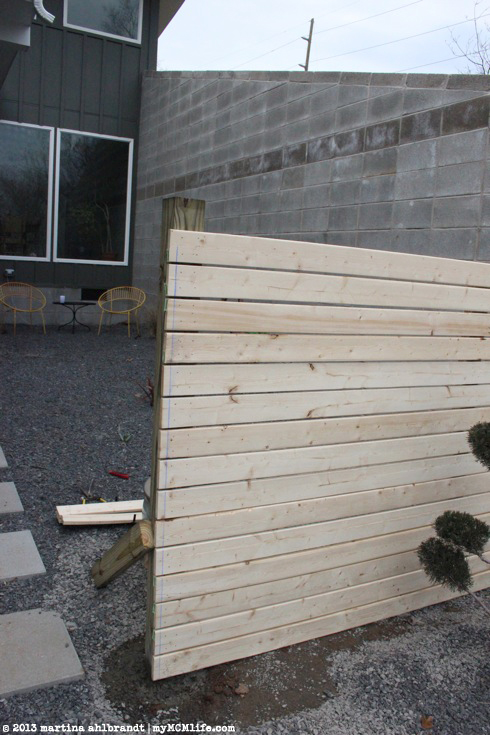
Because we used 8′ planks, we made sure the space between the posts was slightly less than 8′. (If you’re building a fence with more than two posts, check out what we did here…I even have diagrams.)

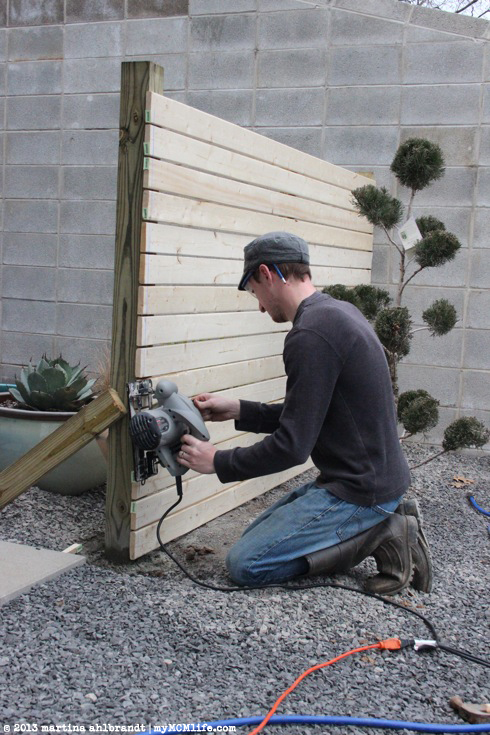
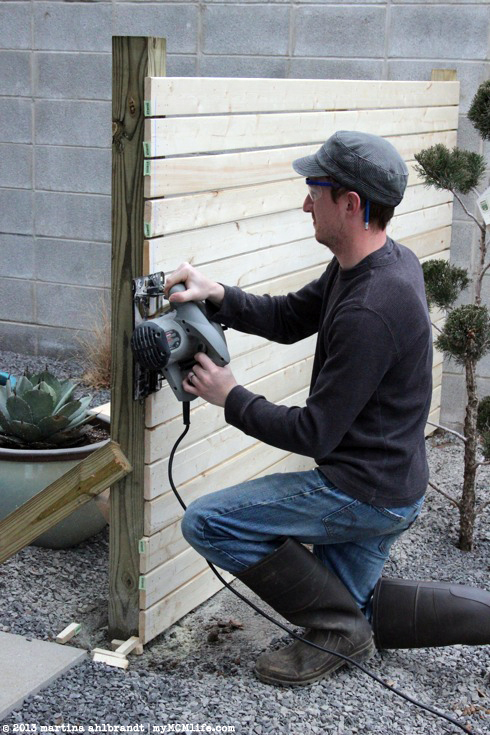
We wanted the planks to be flush with the 4×4 post and we made a chalk line where they needed to be cut.


Jason used his circular saw for this. It’s a bit awkward, especially close to the ground. There may be a better way but this works for us.

I always insist on the safety glasses. I like how Jason tucks his pencil into his hat.


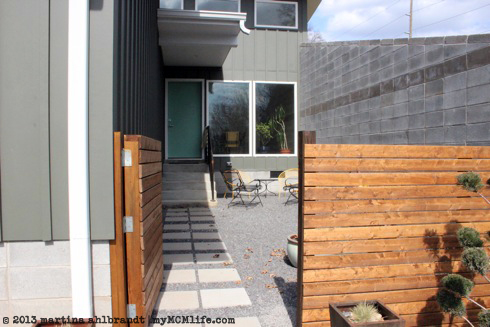
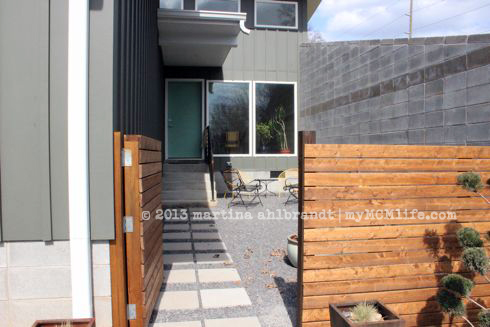
I didn’t do a very good job documenting the gate building process. (We started this project after Ali went down for her nap around 1pm on a Saturday and at this point 3 hours later, she was awake so she could “help” us.) We built a frame out of 2x4s just a bit (maybe 1″ both way) smaller than the opening for the gate. The extra 2x4s down the middle and diagonally (that I didn’t photograph here) help the gate stay square. We attached planks in the same way as the fence – starting first with the outside ends, using the spacer, and then the middle post, also using the spacer, using a pry bar as needed.

Once it was hung, I took a picture of the back side so you can see the two diagonal pieces of 2×4 we added. I’m sure there is a simple way to calculate those angles and cut them but we had a heck of a time and ended up just experimenting until we got some angles that worked. It was pretty amusing! Jason hung the gate with three hinges while I was inside with Ali so I didn’t get a picture of that process. How he did that himself, I have no idea!


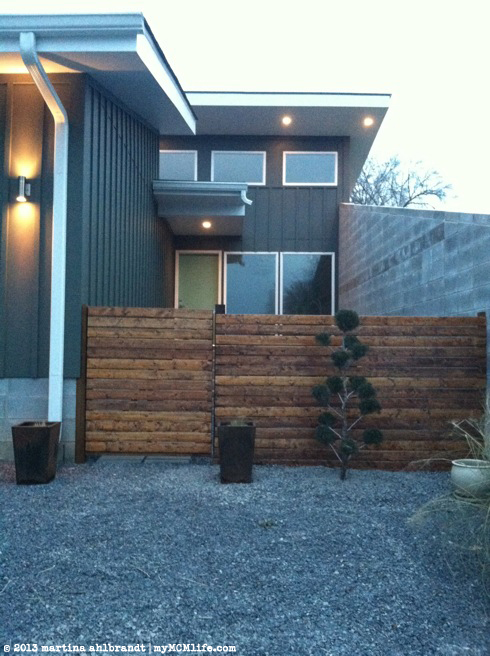
He quickly stained the fence using deck stainer and sealer while Ali and I were having a snack. Just before dark, it was finished. Time to go out for dinner!

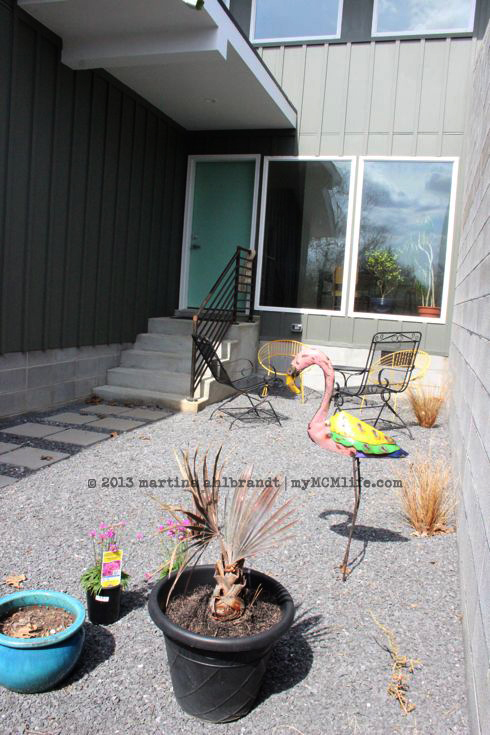
A couple days later, I took some finished pictures.


A hook and eye (attached to the house) hold the gate open.

A hinge door stopper (the same kind we used inside) keeps the gate from hitting the side of the house.


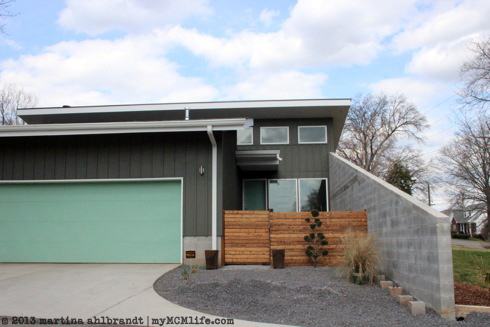
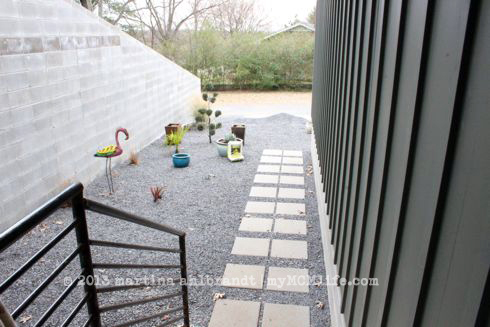
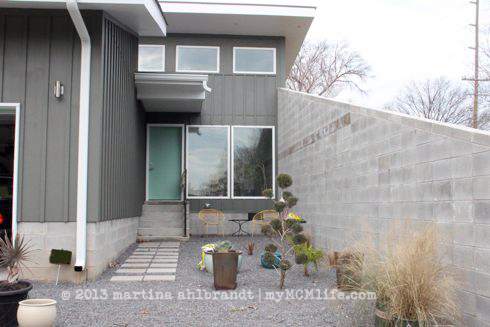
I love how the fence and gate make our courtyard feel so cozy and private. We can sit out here with the toddler and the dog and not have to worry about either wandering out toward the street. This is quickly becoming one of our favorite spots for lunch alfresco, afternoon tea, blowing bubbles for Ali, and evening chats. It’s going to be even more wonderful once the landscaping matures.
…
All of my posts related to “modern wood fence”
Modern Wood Fence —Finished! (at our previous house)
Enclosed Courtyard (intro to this post, including some before pictures.)


 Posted by mahlbrandt